 Coaching Centre
Using a light microscope
Parts of a compound light microscope and what each does, calculating total magnification, preparing wet mounts and stained slides, focusing safely from low to high power, and drawing what you see as a scientific specimen drawing.
Every science teacher has a box of cracked slides, and almost all of them were broken the same way: someone switched to the highest-power lens and wound the big focus knob. At ×400 the lens sits less than a millimetre above the glass. One careless turn and it's through the slide. Learn the routine on this page and you'll never add to the box.
Three kinds of light microscope
- A hand lens (magnifying glass) is a single lens. It magnifies about 5 to 20 times.
- A stereo microscope (dissecting microscope) has two eyepieces and gives a 3D view of the surface of solid objects such as an insect or a flower. It magnifies about 10 to 40 times, with light shining down onto the specimen.
- A compound light microscope uses two sets of lenses, the eyepiece and the objective, and shines light up through a very thin specimen. It magnifies up to about 1000 times. This is the microscope you'll use to look at cells.
Parts of a compound microscope
| Part | What it does |
|---|---|
| Eyepiece lens | The lens you look through. It usually magnifies 10 times (×10). |
| Body tube | Holds the eyepiece and objective the right distance apart. |
| Revolving nosepiece | Rotates to click a different objective lens into place. |
| Objective lenses | Usually three: ×4 (low power), ×10 (medium) and ×40 (high). The longer the lens, the higher its power. |
| Stage and stage clips | The flat platform the slide sits on, with clips to hold it still. |
| Coarse focus knob | The large knob. Moves the stage a long way quickly. Use only with the low-power lens. |
| Fine focus knob | The small knob. Moves the stage a tiny amount to sharpen the image. The only knob to use at high power. |
| Lamp or mirror, and diaphragm | Sends light up through the specimen. The diaphragm under the stage changes how much light gets through. |
| Arm and base | Hold the microscope together. Carry it with one hand on the arm and one under the base. |
Total magnification
The two lenses multiply each other's effect, so the total magnification is
total magnification = eyepiece magnification × objective magnification
Eyepiece ×10 with the ×4 objective: 10 × 4 = ×40.
Eyepiece ×10 with the ×10 objective: 10 × 10 = ×100.
Eyepiece ×10 with the ×40 objective: 10 × 40 = ×400. Things look 400 times wider than they really are.
Making a slide
Light has to shine through the specimen, so it must be very thin, often just one layer of cells. A wet mount keeps it flat and stops it drying out:
- Put a drop of water (or stain) in the middle of a clean glass slide.
- Lay the thin specimen in the drop with tweezers.
- Hold a cover slip at an angle, touch one edge to the drop and lower it slowly with a mounted needle, so air bubbles are pushed out. Bubbles show up as dark-edged circles and are often mistaken for cells.
- Soak up any extra liquid with paper towel.
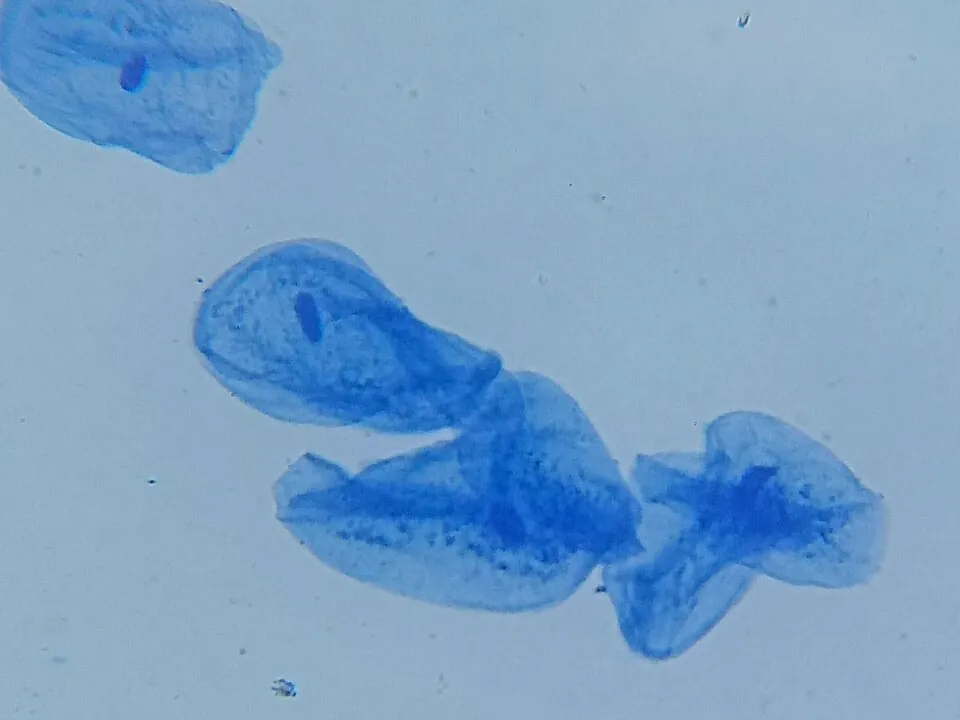
Most cells are almost colourless, so a stain is added to make parts stand out. Iodine turns starch blue-black and colours the nucleus and cell walls yellow-brown, so it's good for plant cells. Methylene blue stains the nucleus dark blue and is used for animal cells, such as cheek cells. Wear gloves and safety glasses: stains mark skin and clothes and irritate eyes.
Focusing: the safe routine
- Click the lowest-power objective (×4) into place and turn on the light.
- Clip the slide onto the stage with the specimen over the hole.
- Looking from the side, wind the coarse focus so the stage rises as close to the lens as it will go without touching.
- Now look through the eyepiece and wind the coarse focus the other way, moving the stage down until the image appears. Sharpen it with the fine focus.
- Move the slide so the part you want is in the centre of the view, then click to the ×10 objective. Use only the fine focus.
- Repeat for ×40. Adjust the light: unstained cells often show up better with less light.
Two things surprise everyone at first. The image is upside down and back to front, so moving the slide left moves the image right. And the higher the magnification, the less of the specimen you can see at once and the dimmer it gets.
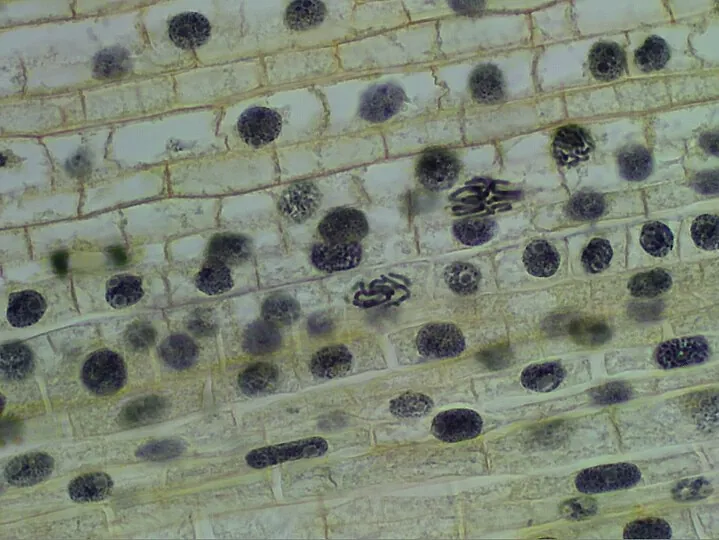
- Load the onion skin. Focus at 4× with the coarse knob, then the fine knob. Drag the view to centre some cells, then step up to 10× and 40×.
- Try each stain. Which makes the nucleus easiest to see in onion cells? In cheek cells?
- Earn all three ticks: a sharp, stained, well-lit view of each slide at ×400.
- Then, deliberately, try the coarse knob at 40× and watch the side view.
Drawing what you see
A specimen drawing is a record, not a work of art. Scientists use it to show exactly what was there.
- Use a sharp pencil and draw on plain paper.
- Draw only what you can actually see, using smooth single lines. No shading or colouring.
- Draw large: at least a third of a page. Show a few cells, not the whole field.
- Label with ruled lines that touch the part and don't cross each other. No arrowheads.
- Give it a title, and write the magnification you used (for example "Onion epidermis cells, ×400").
Test yourself
A microscope has a ×15 eyepiece and a ×40 objective. The total magnification is
15 × 40 = 600.
When you are using the ×40 objective, you should focus with
The high-power lens is so close to the slide that the coarse knob can crash it through the glass.
Under the microscope you see a perfectly round circle with a thick black outline and nothing inside. It is most likely
Air bubbles trapped under the cover slip look like this. Lower the cover slip at an angle to avoid them.
A student wants to see the nucleus in cheek cells clearly. They should add
Methylene blue stains the nucleus of animal cells dark blue.
You move a slide to the left on the stage. The image you see
The lenses turn the image upside down and back to front, so it moves the opposite way.
Label the parts of the microscope.
Put the steps for focusing on a slide in order.
Specimen drawing: good or poor practice?
A student puts a slide on the stage, clicks in the ×40 objective and winds the coarse focus knob until the slide cracks. Explain what went wrong and describe the correct procedure.
The ×40 objective sits very close to the slide, so winding the coarse focus raised the stage too far and pushed the slide into the lens. The student should start with the ×4 objective, raise the stage while watching from the side, then lower it with the coarse focus while looking through the eyepiece until the image appears, and sharpen it with the fine focus. After switching to ×10 and then ×40, they should use only the fine focus.